Cora Hub: Import Builder
Import Builder is a project-level screen where you define a reusable mapping template — which columns in an Excel or CSV file line up with which fields in Cora PPM — and then run that template against an actual file to bulk-load or bulk-update data. The mapping is saved, named, reusable, shareable, and ready to run again as new files come in.
Step-by-Step: Using Import Builder
Import Builder works in two steps: first you build and save a mapping in the Builder panel, then you upload a file and run it against that mapping in the File panel. You can reuse the same saved mapping as many times as you like.
1. Start a New Template, or Load an Existing One
- Open Import Builder.
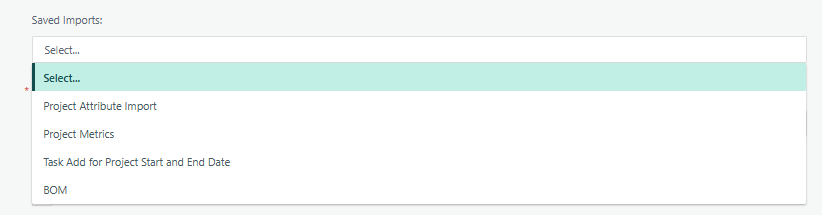
- To reuse an existing mapping, select it from the Saved Imports dropdown — templates someone else has shared are labeled [Shared].
To start fresh, leave Saved Imports blank and begin at Step 2 below.
2. Name and Configure the Template
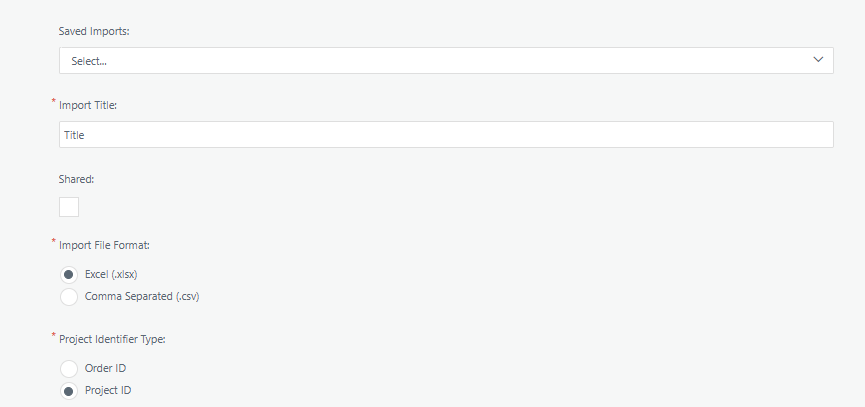
- Enter an Import Title (required) — this is how you and others will find it again in Saved Imports.
- Check Shared if other users should be able to select and run this template too.
- Choose the Import File Format — Excel (.xlsx) or Comma Separated (.csv). Choose CSV only if you plan to use a single section; adding a second section isn't possible on a CSV template.
- Choose the Project Identifier Type — Order ID or Project ID. Decide this now: it locks once you add your first section.
If you chose CSV, also set Format for Date Columns to match how dates appear in your source file (e.g. DD/MM/YYYY, YYYY-MM-DD).
3. Add a Section and Choose What it Imports Into
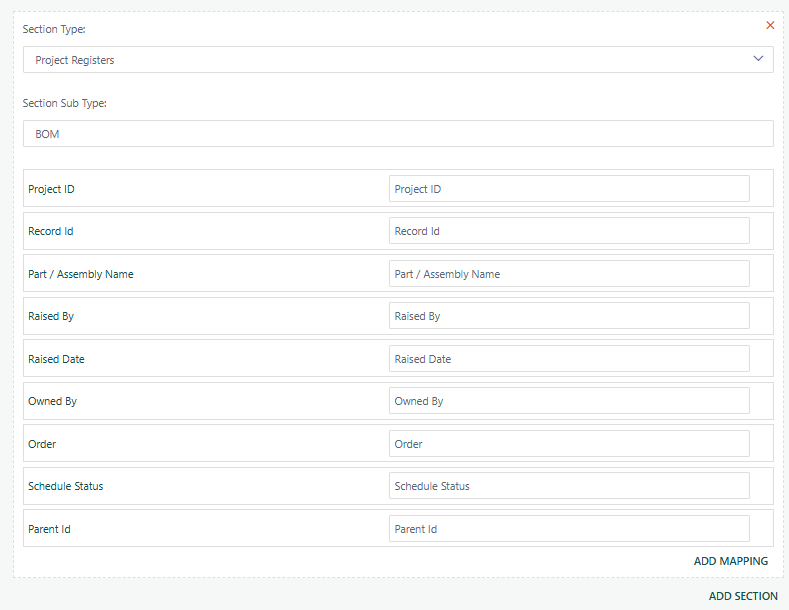
- Click ADD SECTION.
- Choose the Section Type — the data domain you're importing into.
- If you chose Project Registers, also choose the Section Sub Type — the specific register the data should go into.
Project Type | What it Imports Into |
|---|---|
? Project Data | Core project record fields. |
? Project Financials | Financial values/iterations for a project. |
? Project Progress | Progress updates (e.g. percent complete) against tasks. |
? Project Smart Form Fields | Custom smart-form field values on a project. |
✅ Project Tasks | Task records on a project's schedule. |
? Project Registers | Records in a specific custom register (choose it via Section Sub Type). |
? Project Benefit Profile Data | Benefit-profile data tied to a project. |
? Task Activities | Activity-level records under a project's tasks. |
? Benefits Data | Benefits records. |
4. Map Your Columns to Fields
- For each field already listed in the section, type the exact column header text your source file uses into the box next to it — this is what tells Import Builder which column feeds which field. Required fields are always listed and can't be removed.
- Click Add Mapping to bring in an optional field that isn't mapped yet, then map it the same way. Optional fields can be removed again with the “x” next to them if you change your mind.
If this section supports it (Project Financials, or a Registers/Smart Form Fields section tied to an active workflow), choose how imported data should be handled under Submit to Workflow: update saved data only, submit the imported data into the workflow, or (Project Financials only) bypass the workflow and create new approved iterations directly.
5. Add More Sections, if You Need Them
- Repeat Steps 3–4 with ADD SECTION for each additional data domain your file covers.
- Remember: this isn't available on a CSV-format template, and you can't add a second section of a type you've already used.
6. Save the Template
- Click Save.
Saving updates the same template in place — there's no automatic version history. If you want to preserve a mapping before changing it further, save your changes under a new Import Title instead of overwriting the original.
7. Get a Matching Blank File
- Click Next to move to the File step.
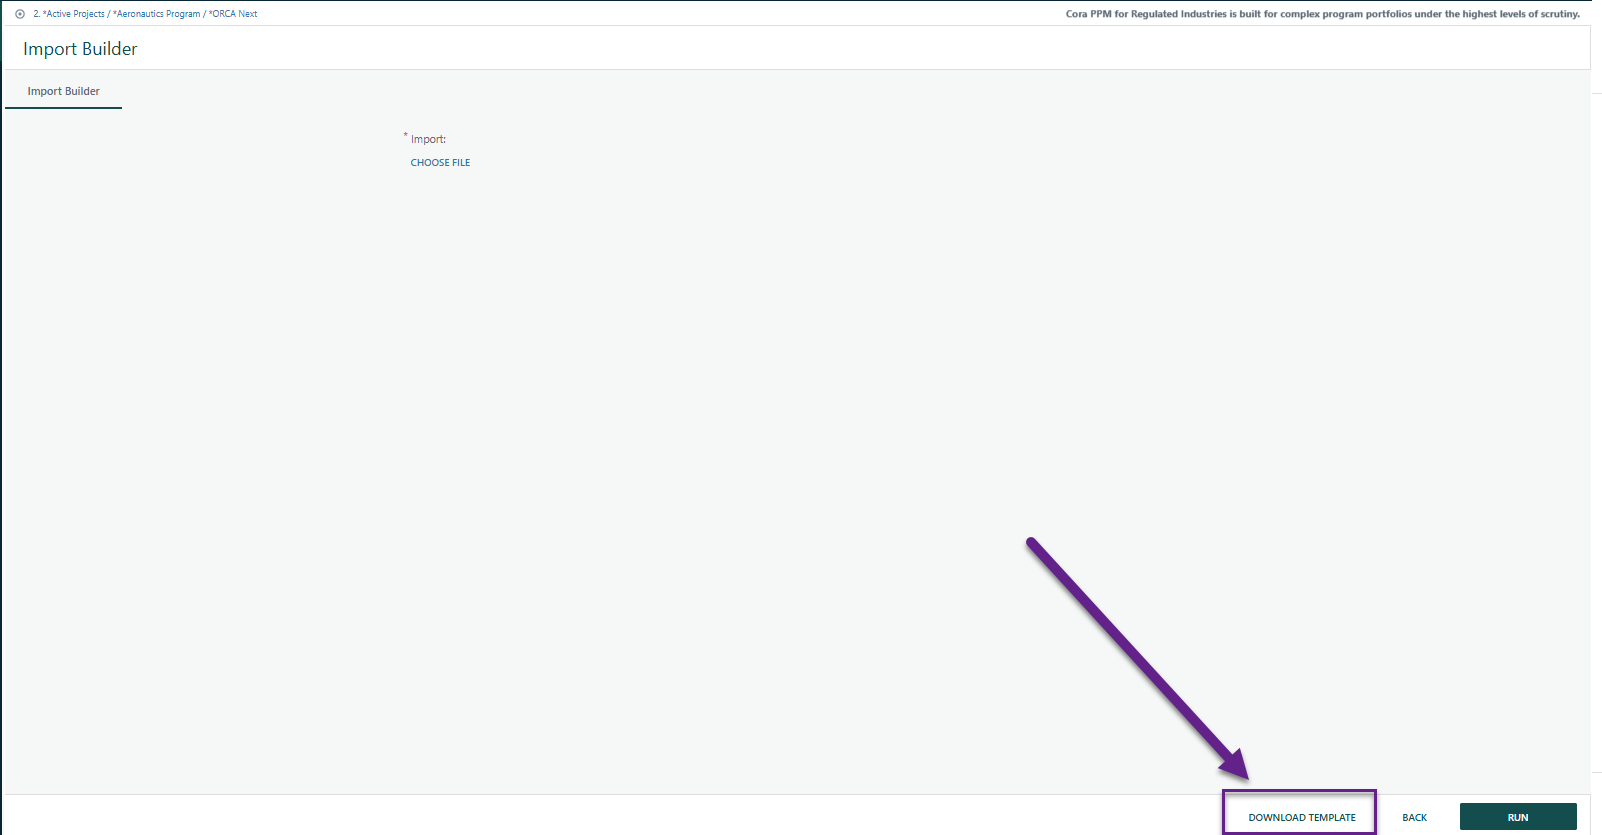
- Click Download Template to generate a blank file (Excel or CSV, matching your Import File Format choice) with the exact column headers your mapping expects.
Fill this in yourself, or send it to whoever is providing the data.
8. Upload and Run the Import
- Use the file-upload control to select your completed source file.
- Click Run.
- Review the validation results grid that appears — it lists each issue found, by sheet and row, with a message describing the problem.
- Fix the issues in your source file and click Run again if anything failed.
- Click Back at any point to return to the Builder panel and adjust your mapping instead.
9. Review past import runs
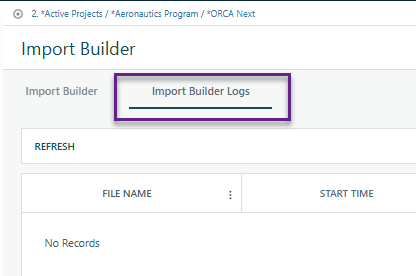
If your organization has this feature enabled, you'll see an Import Builder Logs tab.
- Open the Import Builder Logs tab.
- Review the history of previous runs.
Download the saved, annotated file from a past run if you need to see exactly what was submitted and what came back.
Was this article helpful?
That’s Great!
Thank you for your feedback
Sorry! We couldn't be helpful
Thank you for your feedback
Feedback sent
We appreciate your effort and will try to fix the article