Payment plans in Cora PPM have two configuration layers: a one-time global setup, and reusable payment plan templates that project teams then apply to individual projects.
Part 1 — Global Payment Plan Configuration
Go to Admin → Payment Plans Configuration → Configuration tab.
- Payment Plan Register — pick which Custom Register payment plan data will read/write against.
Once a register is selected, three more dropdowns populate from that register's numeric fields:
- Register Cost Field
- Register Revenue Field
- Register Billing Field
- These three must all be different fields — the form validates this and blocks Save otherwise.
If Baseline Change Control is enabled for the tenant, two extra fields appear:
- Parent BCC Register
- BCC Field — populated once a Parent BCC Register is chosen.
- Click Save. This is a single tenant-wide configuration record — there's only one, and it's audited with a
Payment_Planner_Configurationhistory entry.
Part 2 — Create a Payment Plan Template
Switch to the Payment Plans tab on the same page. This lists all existing payment plan templates, including Description, Archived flag, and Copy action.
- Click Add to open the “Add Payment Plan” modal.
On the Attributes tab, complete the required configuration:
- Description — required, max 100 characters.
- Group — only shown if a grouping type applies.
- Archive — hide this template from being newly applied to projects.
- Costs by Period — toggles whether costs are tracked per period.
- Notification Cost / Notification Revenue / Notification Billing — at least one must be checked.
- Click Save or Save and Close.
- Switch to the Fields tab to define the fields that will appear on this payment plan.
Click Add to open the field editor, then configure:
- Name required, Help Text, Required, Not Visible, Allow Changes, and Archived.
- Payment Plan Section — which section of the plan the field lives in.
- Type — field type such as text, number, calculated field, linked field, or custom list.
- If Type is Calculated Field, use the calculator icon to open the Formula Editor and define the formula.
- If Type is Linked Field, pick the Linked Field to tie it to a register field.
- If the source is a custom list, pick the Custom Source.
- Sizing and format options include Display Width/Height, Max Length, Show Character Count, Decimal Places, Is Percentage, Is Currency, Min/Max Value, and Include in Total Row.
- Click Save.
- Reorder fields by dragging rows in the grid. Edit and Delete act on the selected row; system/default fields can't be deleted.
Click Close once the template is complete.
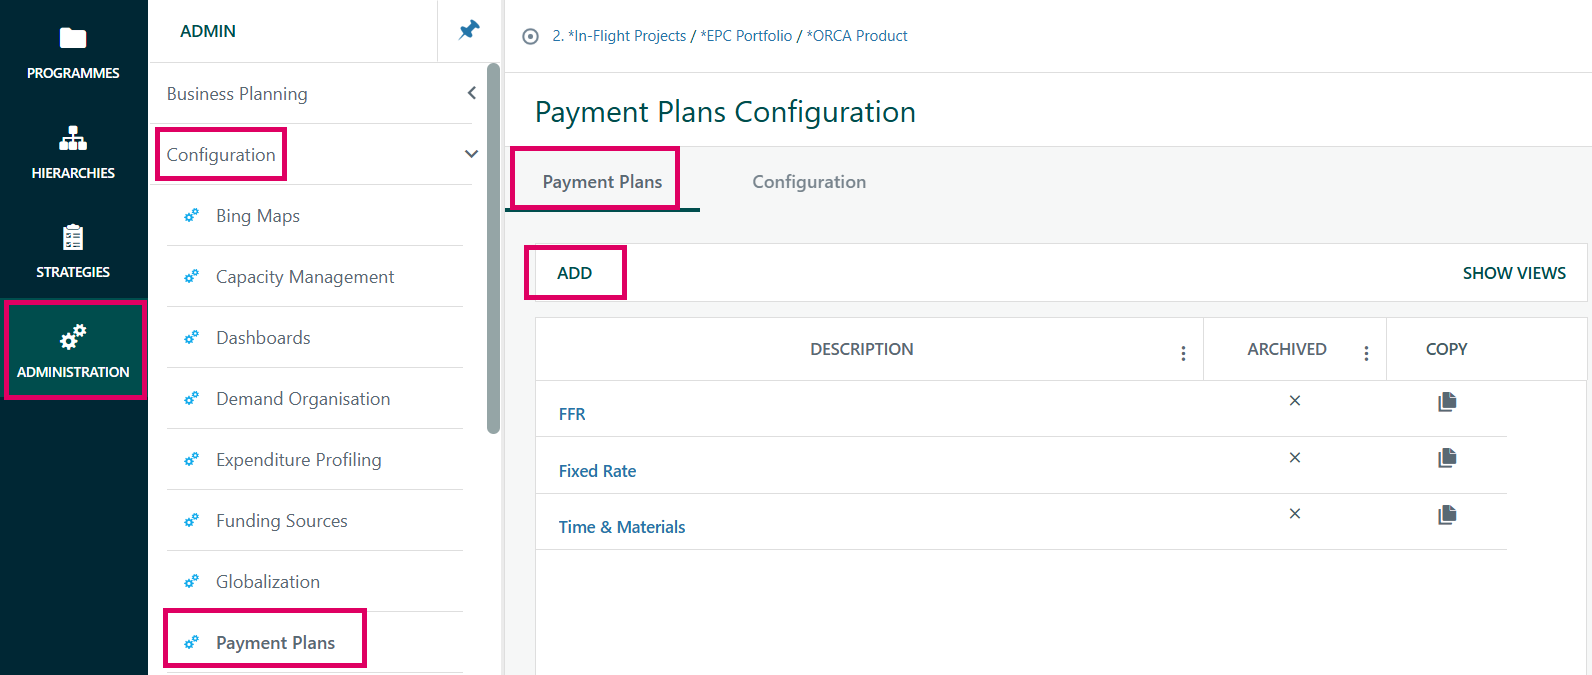
Tip: Instead of building a template from scratch, use the Copy icon next to an existing plan in the grid. It clones the plan, its fields, and calculated-field formulas, then reopens the copy in edit mode so you can rename it and tweak fields.
Part 3 — Applying The Plan
Once a template exists, project teams add it to a specific project via Payment Schedule → Add Payment Plan, where they select the Payment Plan Type and, if change-request tracking applies, a linked Change Request.
Area | Who Configures It | What To Check |
|---|---|---|
Global Configuration | Administrator | Payment register and mapped cost, revenue, and billing fields are set correctly. |
Template Setup | Administrator or PMO | Description, notifications, fields, formulas, and archive status are complete. |
Project Application | Project Team | The correct Payment Plan Type and linked Change Request are selected. |
Gotchas: At least one notification option must be selected, mapped register fields must be unique, and Max Value must exceed Min Value where those limits are configured.
Was this article helpful?
That’s Great!
Thank you for your feedback
Sorry! We couldn't be helpful
Thank you for your feedback
Feedback sent
We appreciate your effort and will try to fix the article