Resource Demand - Deprecated Functionality - replaced by Resource Allocation
Where to find it:
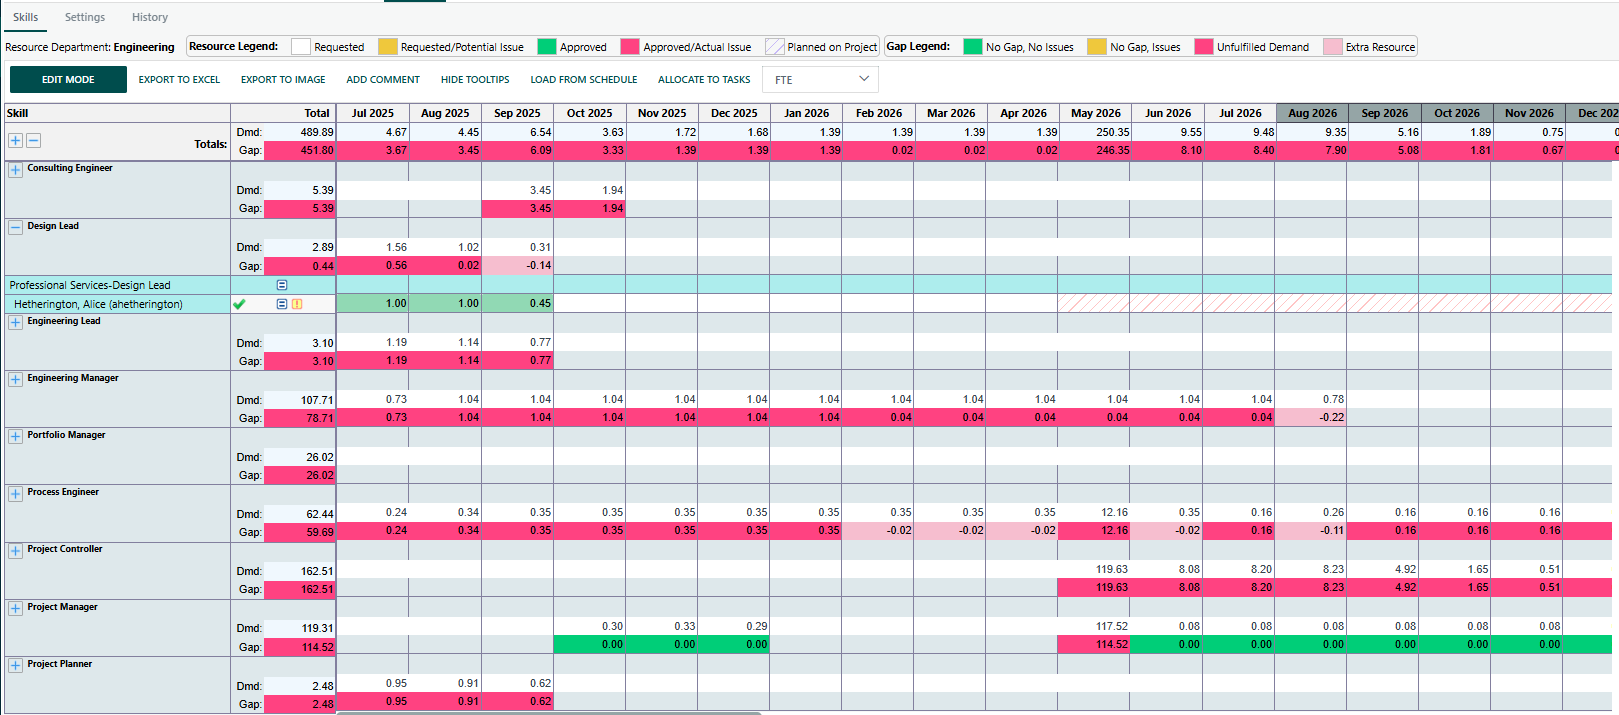
- Navigate to a project, then select Resource Demand from the project toolbar. The feature is only visible if the Capacity Management module is configured and the project's type is enabled for demand.
Common tasks:
Add a Skill requirement:
- Click ADD SKILL (top-left). A modal opens where you select the skill, configure demand amounts per period, and save. Only the Project Owner can add skills.
- Skill rows appear in the grid. Each row shows sub-skill variants (expandable). The grid header column shows DEMAND / ALLOCATION (or DEMAND / GAP depending on the "Demand figures" dropdown).
Add or edit a Resource (allocate a named person to a skill slot):
- Click a cell in a skill/sub-skill row to select it (cells highlight in blue when selected).
- The ADD RESOURCE or EDIT RESOURCE buttons become enabled.
- Click to open the resource modal, select from available users (filtered by their skills and availability), and set their FTE/Days/Hours allocation per period.
- Each user row in the grid shows their allocation value alongside an approval status: Req (Requested), All (Allocated), App (Approved), Rej (Rejected).
Approve or reject an allocation:
- If you are a Demand Approver or Supply Manager, rows pending your approval show Approve and Reject buttons in the totals column.
- Clicking Approve/Reject triggers a confirmation dialog, updates the status, sends an email notification to the relevant parties, and logs the action in history.
View pending requests:
- The VIEW RESOURCE REQUESTS button (enabled when there are pending allocations you need to act on) scrolls to and expands all pending rows.
Load demand from the schedule:
- Use the ☰ menu → Load From Schedule to run the distribution-curve calculation that reads task durations and skills from the Gantt and populates the demand figures automatically.
Allocate approved resources to tasks:
- Once at least one allocation is approved, the ☰ menu → Allocate to Tasks option becomes active. Use it to auto-assign the approved users to the tasks in the schedule.
Change view options:
- Calendar dropdown: switch between Monthly and Weekly period columns.
- Unit of measure dropdown: switch between FTE, Days, and Hours.
- Demand figures dropdown: switch between showing Allocation (how much is allocated) or Gap (how much remains unallocated vs. demand).
- View checkboxes: show/hide rows where demand is met or not met.
Tips & Gotchas:
- The ADD RESOURCE and EDIT RESOURCE buttons are disabled until at least one period cell is selected.
- If you change the Calendar or Unit of Measure dropdown to a non-project-default value, the Add/Edit/View Request buttons are temporarily disabled (the grid becomes read-only until you restore the project's native settings).
- The "Load From Schedule" option overwrites existing demand figures from the current period onwards.
- The "Allocate to Tasks" button only appears if the user has full WBS/Gantt task rights on the project.
Was this article helpful?
That’s Great!
Thank you for your feedback
Sorry! We couldn't be helpful
Thank you for your feedback
Feedback sent
We appreciate your effort and will try to fix the article