Project Registers: Creating a Register Record
A Register in Cora PPM is a flexible, structured list (or log) of items associated with a project. Think of it as a custom-built spreadsheet or table that your organization has configured to track a specific category of project data — for example a Risk Register, Issue Log, Change Request Register, Action Log, Decision Register, or any other collection of records that your project needs to manage.
Unlike a fixed built-in module, each Register is fully configurable by your administrators: they choose which columns (called custom fields) appear, what data types those fields hold (text, dates, numbers, dropdowns, user pickers, calculated values, costs, Booleans, etc.), which statuses are available, and what permission levels each project profile can exercise.
Registers exist because projects universally need to track lists of "things" beyond the schedule. A risk, an issue, a change request, a lesson learned — each is a record in a Register. Centralizing these records inside Cora PPM connects them directly to the project context and enables reporting, dashboards, workflows, and audit trails.
Creating a Register Record
Add a New Record
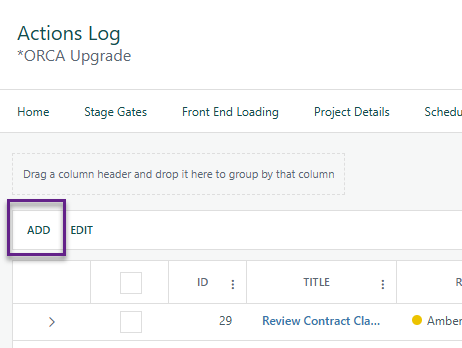
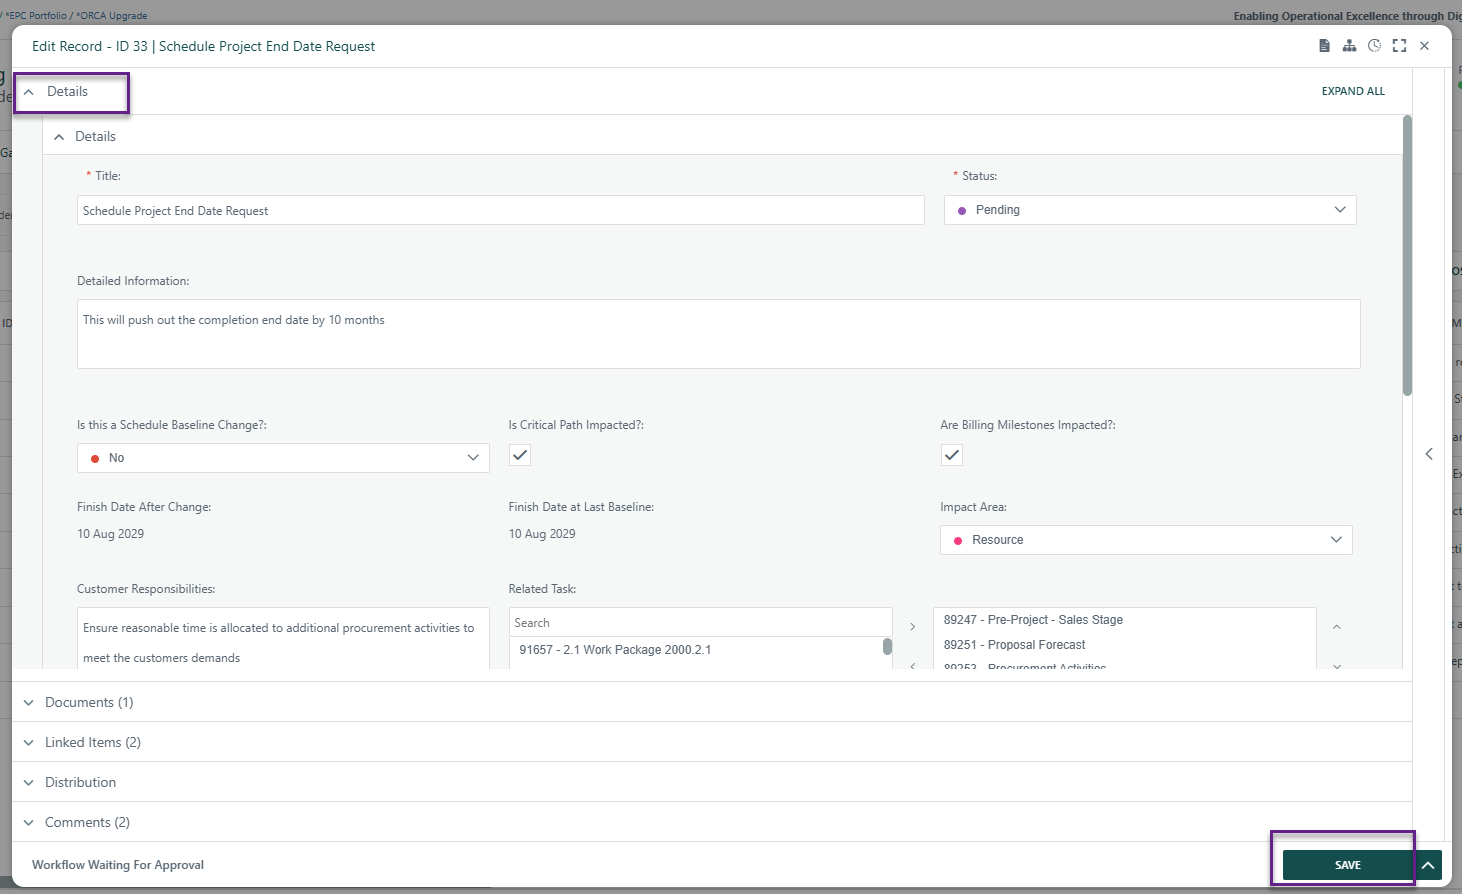
Clicking the Add button in the register's toolbar opens a sliding side-panel form called the Record Detail view. The form is built dynamically from the register's configuration – text boxes, date pickers, dropdowns, checkboxes, multi-select lists, calculated fields, and more appear according to the fields configured by an administrator. Required fields are marked with an asterisk. When you click Save, the record is persisted, the grid refreshes, and a success toast appears. Clicking Save & Add Another saves the current record and immediately blanks the form so you can enter the next one. If the register is configured with more than one field group, the groups appear as collapsible accordion sections within the panel, and a side navigation panel on the left lets you jump directly to any section or field that has a validation error. Certain fields are read-only (calculated values, task-derived attributes), and some may appear or disappear based on what you select in other fields (visibility formulas). Currency fields can be shown in a different currency if multi-currency is enabled.
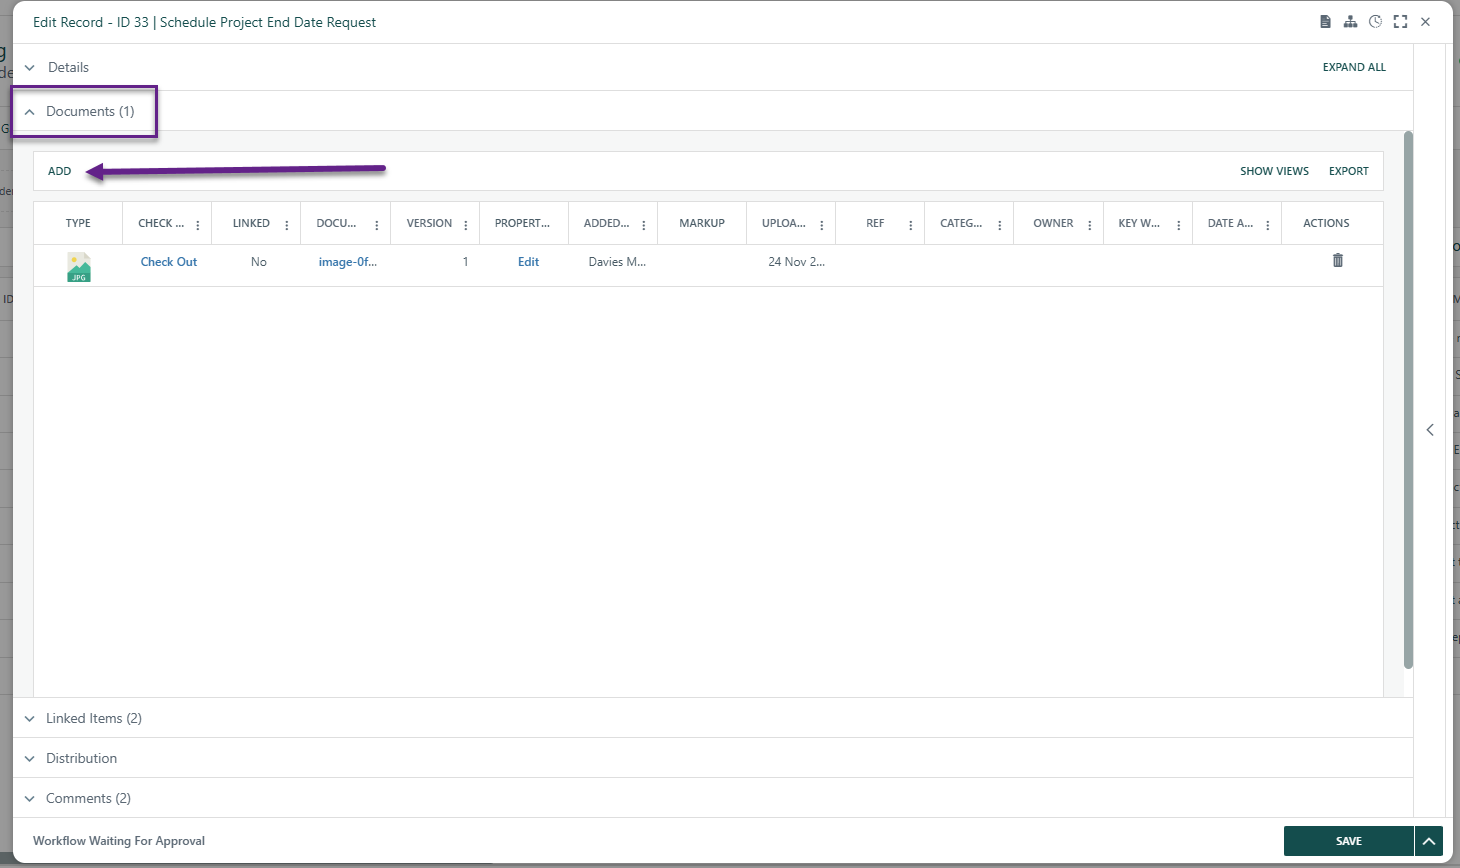
Add a Document
Once a record has been saved (it must have an ID), the Documents tab becomes available in the record side-panel. From there you can upload a file from your computer, or add a link (URL/UNC path) to an external file. Documents can be checked out to prevent others from overwriting them, checked back in, and deleted. A document icon appears in the register grid row so you can see at a glance whether a record has attachments. The Documents tab label shows a live count of attached files.
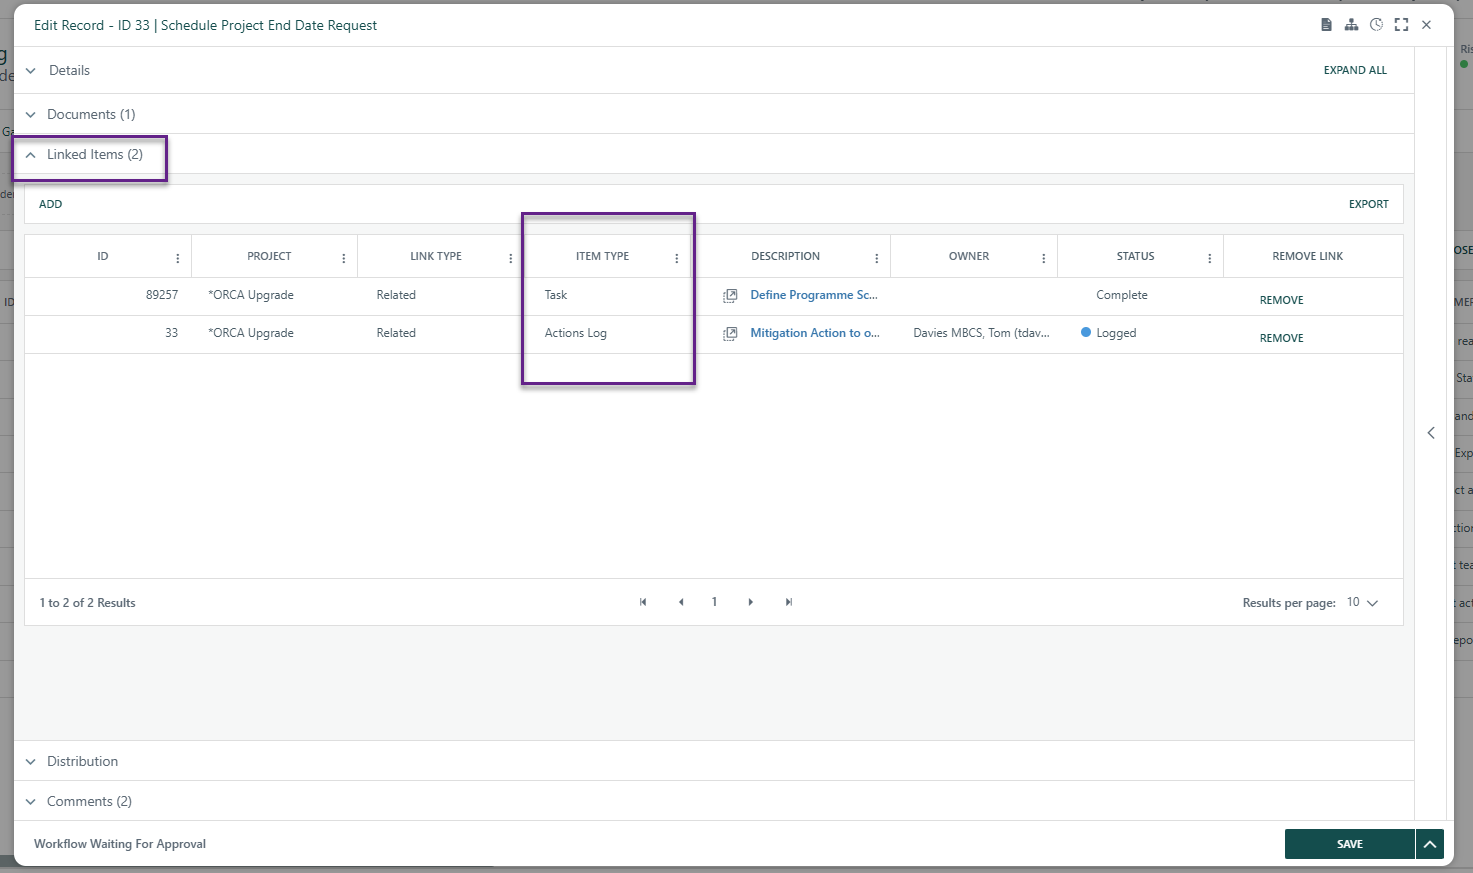
Link an Item
The Linked Items tab in the record side-panel lets you connect the current record to other items in the system. Clicking Add on that tab opens a dedicated linking dialog. You choose:
- What you want to link to – another register record (from any register that has linking enabled), a Task, a Risk, an Issue, or a Cost Book Line.
- Which instance – you can either pick an existing item from a dropdown, or click Next to create a brand-new item in a sub-modal and automatically link it to the current record.
- How – as a Related, Parent, Child, or (if configured) as a direct child-register record.
Once saved, the Linked Items tab shows a count of all attached links. Each linked item shows its description, its type (e.g. "Risk – Related"), a status color-bulb if it is a register record, and buttons to navigate to the linked record or remove the link. Removing a link recalculates any linked-aggregate fields on the parent record. If the register is configured with Linked Register Aggregate fields, these update automatically to reflect totals across all linked records.
Use Distribution
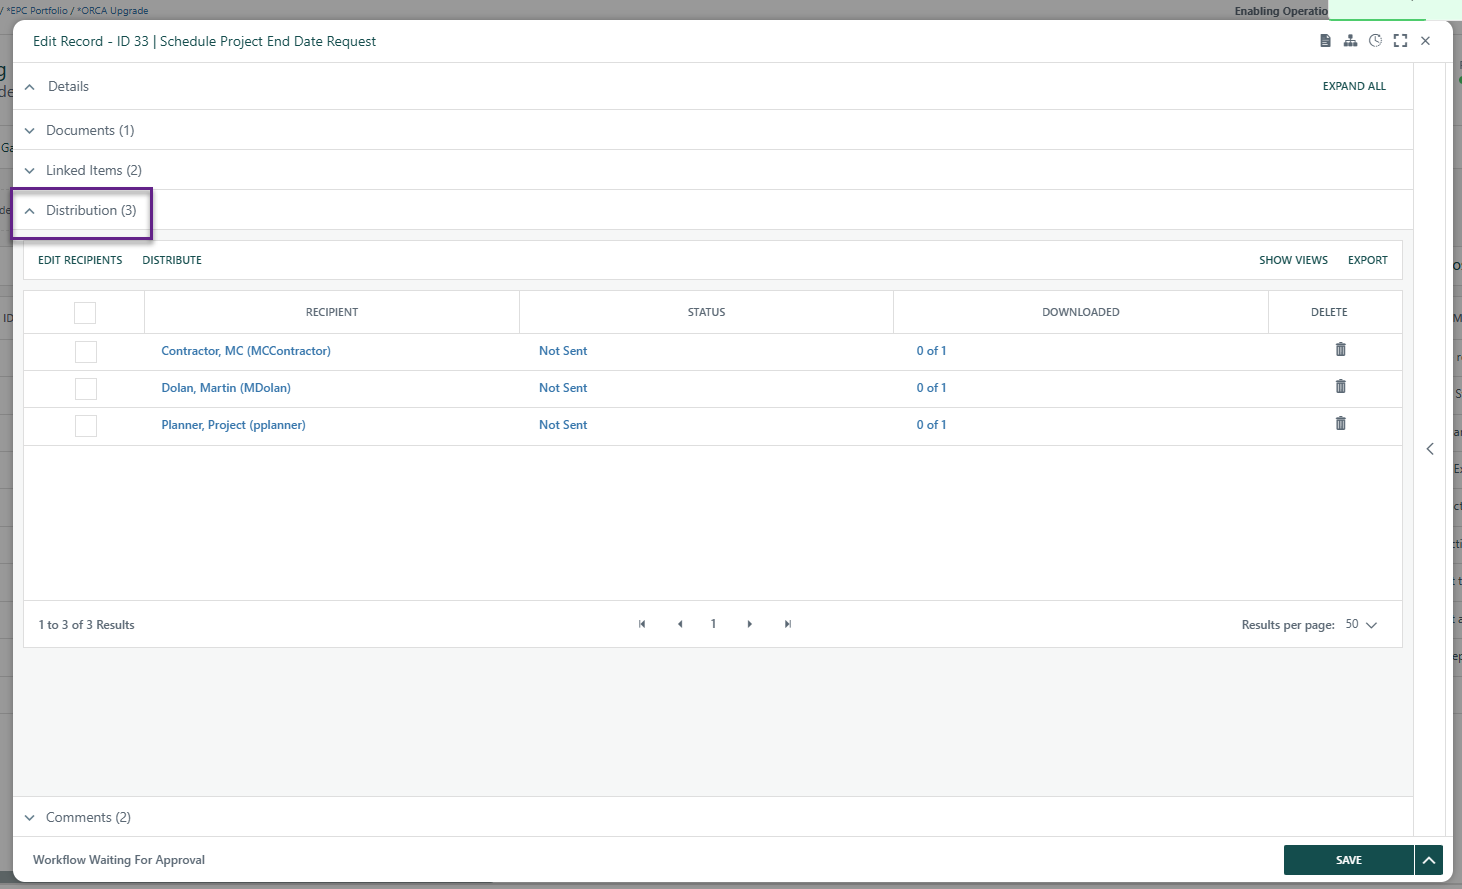
Distribution is an optional feature that, when enabled for a register, lets you manage a controlled circulation list for each record. The Distribution tab in the record side-panel shows a table of recipients. You:
- Select the users you want to send the record to, using the Distribute button which triggers an email to each selected user with a secure link to view the record.
- Track who has been sent the record, who has read it (with date/time), and whether each attached document has been viewed.
- Click a recipient's name to view a full audit trail of what they have seen and when.
- Remove a recipient (only possible before the email has been sent).
The register grid itself also shows a distribution summary column (e.g. "2 of 5") indicating how many recipients have read the record out of how many have been sent it. In Distribution view mode (when you access the record via a distribution link), editing is disabled and only comments relevant to you are shown.
Add a Comment
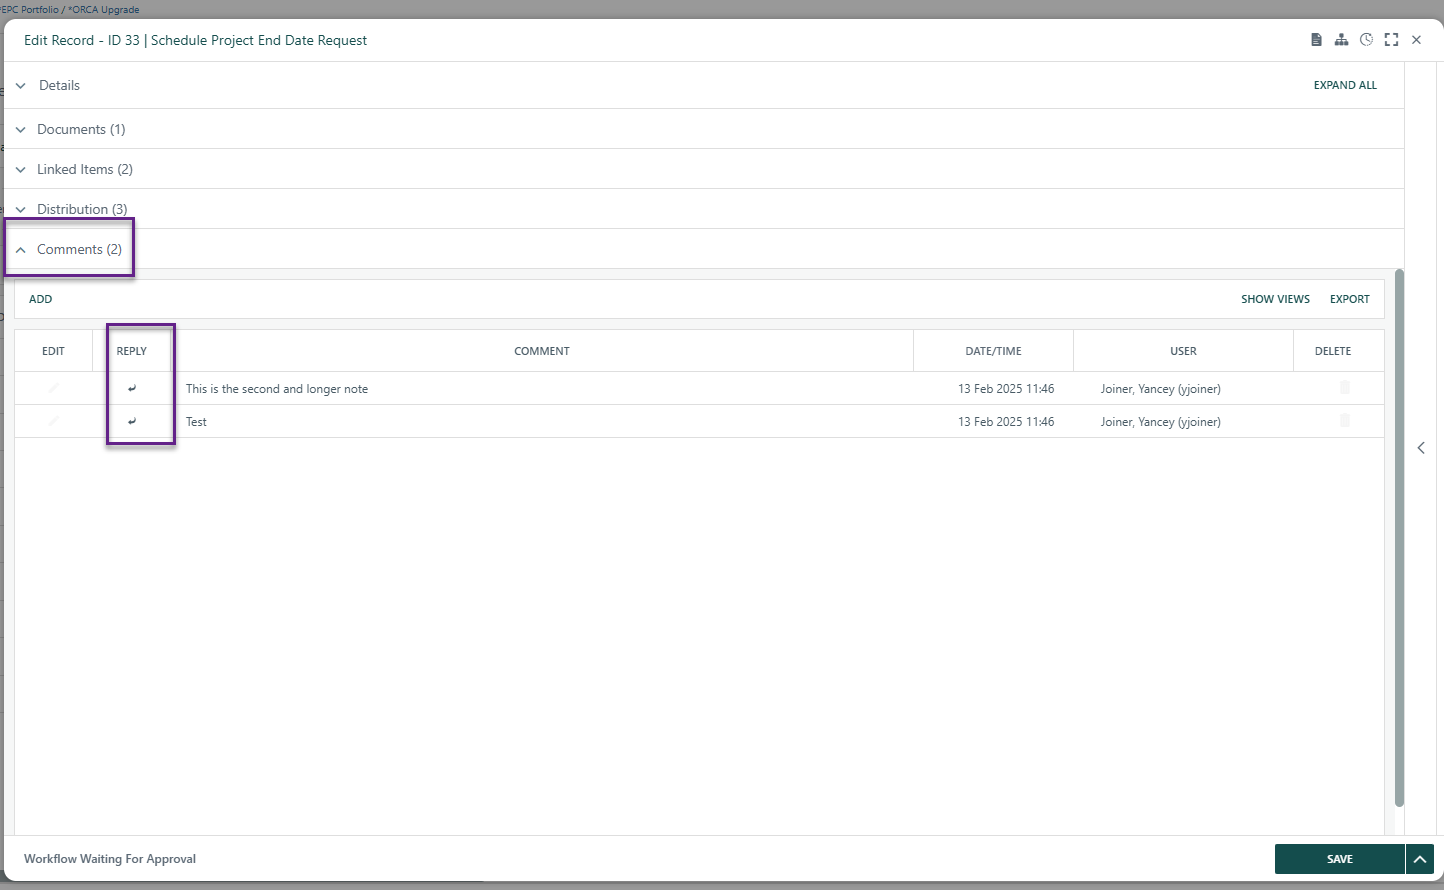
If the register is configured to allow comments, a Comments tab appears in the record side-panel. Users can type free-text comments, and also reply to an existing comment to create a threaded conversation. Comments show the author's name, a timestamp, and an indented reply thread. Authors can edit or delete their own comments (delete is disabled once a comment has replies). When viewing a record in Distribution (read-only) mode, you see only your own comments. The Comments tab label shows a live count of comments on the record.
Was this article helpful?
That’s Great!
Thank you for your feedback
Sorry! We couldn't be helpful
Thank you for your feedback
Feedback sent
We appreciate your effort and will try to fix the article